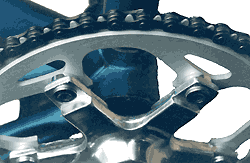
The word "chainline" refers to how straight the chain runs between the front and rear sprockets. Ideally, both sprockets should be in the same plane, so that there is no sideward motion or stress to the chain. This constitutes "perfect chainline".
In the case of derailer geared bicycles, the chainline is not perfect in most gears. Chainline mismatch can cause the chain to rub against the side of an outer, larger chainring when engaged with a smaller one, and can cause problems with shifting, especially with the front derailer. The worse the chainline, the worse the mechanical efficiency of the drive train, though research has shown the loss to be minor, at least with modern, flexible chains.
"Correct" chainline for a derailer system is a matter of opinion, and depends on the intended use of the bicycle. There are two "simple" answers to the question of what constitutes proper chainline.
Chainline Standards:
Application
Dimension
Notes
Track/Coaster Brake Traditional One-Speed Most internal gear hubs
40.5-42 mm
Older bikes with 110 spacing would be on the smaller end of this range Newer bikes with 120 mm spacing normally use 42 mm
Road Double
43.5 mm
Shimano spec, measured to the midpoint between the rings. with typical 5 mm chainring spacing, this puts the inner at 41 mm, the outer at 46 mm.
Road Triple
45 mm
Shimano spec, measured to the middle ring.
Singlespeed MTB Alternate
47.5 mm
White Industries ENO hubs use this chainline, which lines up with the middle position of a typical MTB triple. It's also fairly close to the outer position of a typical "road" double.
MTB Triple
47.5-50 mm
Shimano spec, measured to the middle ring. 47.5 preferred, but for frames with oversized seat tubes, the longer dimension may be needed, because the fat tube places the front derailer mechanism farther to the right. SRAM standard chainline is 49mm with 142mm OLD and thru axle
Singlespeed and Single-chainwheel MTB, "Boost 148"
52 mm
Wider chainline need for chainstay clearance on newer MTBs, typically with disc brakes and 148 mm OLD spacing This is close to the chainline of the outer ring of a typical MTB triple.
Rohloff Speedhub
54 mm (58 mm w/13 tooth)
Sprockets are proprietary, threaded. All except the 13-tooth may be flipped over to double wear life.
Freeride and Downhill
55 mm
Newer Freeride and Downhill bikes with 150 mm spacing
Fatbikes with 190 mm spacing -- needed with 4.8" (125 mm) wide tires.
Chainline Measurement-Front
Chainline is measured from the centerline of the frame to the center of the chain.
You can measure the front chainline directly with a simple ruler. Simply hold the ruler against the seat tube or down tube and measure the distance from the middle of the seat tube to the middle of the chainring teeth. In the case of triple chainwheel sets, measure to the middle chainring. In the case of doubles, measure to the halfway point between the two rings. In the photo below, the chainline is about 44 mm. It's easier to see the centerline of the seat tube than in this photo, because the reflection or shadow of the ruler curves away from where the ruler contacts the seat tube. (Or, if you know the diameter of the seat tube you can measure from the side nearest the chainwheel, and add half the seat tube's diameter.)
Chainline Adjustment-Front
Front chainline may be adjusted either by moving chainwheels, or by moving the crank(s) -- also affecting tread, symmetry of the pedals around the bicycle's centerline, or both.
The list below covers all options, starting with the simpler ones.
chainwheel spacers photoChainring Spacers For a single chainring, you can add spacers between the chainring and the crank spider. If your chainring is mounted on the outside of the spider, you can move it to the right this way. If it's mounted on the inside of the spider, you can move it to the left as shown.
This uses the same 10 mm I.D. spacers normally used on rear hub axles.
Suitable spacers are available in 1, 2, and 3 mm thickness. You may need to use longer "double" stack bolts, especially for the 3 mm size.
Leave off a chainwheel You might leave off the outer or inner chainwheel of a double or triple, effectively moving the chainline inward or outward by half the spacing between chainwheels, generally about 2.5 mm. It is quite common to use the two inner positions of a triple crankset as a double, with a chainring protector plate in place of the outer chainring. If converting a double to a single, you could also use chainring spacers as described earlier.
Bottom Bracket Spacer If you need to increase the chainline (move the chainring to the right) you can usually add a spacer washer between the right-side bottom bracket mounting ring (or cup) and the bottom bracket shell of the frame. The usual spacer for this is a Sturmey-Archer sprocket spacer. Metal spacers without internal lugs used with Shimano cassettes also will work. These fit all threaded bottom brackets except Italian size. Sorry, I don't know of any source for a spacer that will fit an Italian (36 mm) bottom bracket. Adding a spacer on the right side will move the left bottom bracket cup or mounting ring inward -- a lockring might not then engage enough threads, so check before you commit to this.
Change the Bottom Bracket Most bottom brackets made since the mid-'90s are symmetrical, they stick out the same amount on each side. If you replace your present bottom bracket with one that has a spindle say, 4 mm shorter, it will move the chainline 2 mm to the left, because it will be 2 mm shorter on each side, and the cranks will remain equally spaced from the bicycle's centerline. If you go this route to a narrower chainline, make sure that there won't be a clearance problem between the frame and the crank or chainring. With steel frames, it used to be common to add a bit of clearance for the small inner chainring of a triple crankset by a light hammer blow to the right chainstay, using a broom handle to soften and spread the impact. Only do this with a steel frame!
Phil Wood Bottom Bracket Phil Wood BBs are super quality, available in many different lengths, and they also feature the ability to adjust the chainline over a range of several millimeters.
Phil Wood stuff is expensive, but it's the Very Best.
Replace the Crank(s) Older cranks extended at a right angle from the bottom-bracket axle. Newer, "low-profile" cranks angle slightly outward toward the pedals and generally achieve a wider chainline if used with the same bottom-bracket axle. There also is considerable variation among brands and models. Switching to angled cranks may also help if a cyclist is "duck-footed" and his/her ankles hit the cranks while pedaling. Replacing the crank(s) is "cut and try" and works best if you have a stash of cranks to try out. You need to be careful about crank/axle compatibility if mixing and matching parts. Also see my article about bottom-bracket tapers.
Measure the distance from the inside of the rear fork end (or the outside of the axle locknut) to the middle of the sprocket or sprocket cluster. (Example: 18 mm). With a sprocket cluster, you do this in three steps:
Measure the distance from the inside of the rear forkend (or the outside of the axle locknut) to the outer face of the outermost sprocket (not to the cassette locknut or other part which might extend past the sprocket). (Example: 4 mm)
Measure the width of the cluster from the outer face of the outer sprocket to the inner face of the inner sprocket, or you may use the width from my spacing cribsheet, which covers most cassettes and multi-speed freewheels. (Example: 28 mm)
Add the dropout-to-outer sprocket spacing (Example: 4 mm) to half the cluster width (example 14 mm): Example total, 18 mm.
Subtract the dropout-to-sprocket (or mid-cluster) spacing (Example: 18 mm) from the half-over-lock-nut dimension (Example: 65 mm) to determine the actual rear chainline (Example: 47 mm)
On a bicycle with a sprocket cluster, this is the chainline to the middle of the cluster. With a single chainwheel, this should match the front chainline, to equalize the chain angle for the inner and outer sprockets. With more than one chainwheel, the front chainline could be shifted a few mm inward or outward depending on how the chainwheels are to be used. The article about chainline with derailers covers that topic at length.
Chainline Adjustment-Rear
More about rear chainline adjustment including data on specific hubs may be found in the articles:
Chainline may be adjusted at the rear wheel by rearranging spacers on the rear axle, and with a steel frame, also by re-spacing the rear dropouts. Adjustable hubs use conventional threaded axles, so you can increase the OLD spacing by removing the locknuts and adding spacer washers, and replace the axle as needed.
If you add equal thicknesses to both sides, the chainline is unaffected, since it's measured from the middle outward.
If you add more spacers to one side, or move them from one side to the other, you can change the chainline, but this will render a double-sided (flip-flop) hub unusable on one side or the other, since you'll be increasing the chainline on one side while decreasing it on the other -- unless you also use a different chainring depending on which way the wheel is inserted.
Moving spacers from one side to the other will disturb the alignment between a disc brake rotor and caliper. Re-spacing a frame will tilt the caliper and cause a slight lateral misalignment. Avoid these modifications unless the brake allows adjustments to compensate for them.
Axle Re-Spacing/Re-Dishing This is the usual way to go for converting bikes from a multi-speed derailer setup to a single-speed fixed-gear or freewheel drive. It is also useful when adjusting the chainline of a multi-speed bicycle.
It is almost always possible to add spacer washers on the left side of an internal-gear hub, or in many cases,to remove a washer or use a thinner locknut. Almost all internal-gear hubs are designed so bearings are adjusted only on the left, and many have the driver, or a a rotary shifting mechanism, immediately inside the right dropout. In this case, attempting to adjust or remove parts on the right may result in difficult reassembly or damage. It may still be possible to add a spacer on the right, if there is still enough axle extension to hold the right-side axle nut -- and the bellcrank or "clickbox" which shifts some hubs.
Spacers, if any, are located just behind the outer locknuts, between the locknuts and the cones (or the bearing mounting nuts, if your hub uses cartridge bearings.) You will need cone wrenches and a general understanding of hub bearing adjustment to do this job.
Assuming the rear hub's spacing already matches your frame's spacing, you can take spacer washers from one side of the hub and move them to the other side, thus shifting the entire hub from side to side. In the case of a hub originally meant for a multi-speed freewheel, there is usually a rather thick spacer on the right (freewheel) side of the hub. You can replace this with a stack of thinner spacer washers that add up to the same overall thickness, then distribute the washers from side to side as needed to get the chainline where you need it to be.
Once you have done this, you'll need to re-dish the wheel by adjusting the spokes. This is a bit of trouble, but, in the case of multi-to-single-speed conversion, the re-dishing actually results in making the wheel much stronger than it was.
Sprocket Dishing Most internal-gear hubs have 3-lug "dished" sprockets that can be installed either dished in, or out, providing a choice of two different chainlines. Flat sprockets also are available. Interference with the hub or frame may prevent use of a small sprocket and/or determine which dishing will work. A sprocket may install perfectly well on the hub, but the chain still can interfere, so check with a chain. Fixed-gear sprockets are usually intended to be installed with the flange facing inward, so the teeth are outboard. However, in many cases, it is possible to flip a fixed-gear sprocket over if you need to move the rear chainline to the left.
Spacing Washers Sturmey-Archer internal-gear hubs generally have two 1/16" (1.6 mm) spacer washers next to the sprocket. These can be arranged in various ways, along with the dishing of the sprocket, to optimize chainline. Shimano makes the same diameter of washers in 1 mm thickness, for use with a 10-speed cassette. These are metal washers. Plastic washers that fit between the sprockets on a Shimano cassette have internal lugs that get in the way, and they compress too easily to be suitable for use with a threaded sprocket. These spacers also can be used with freewheels or fixed-gear sprockets, if there is sufficient thread engagement on the hub.