WikiPedalia is not endorsed or affiliated with the Wikimedia Foundation.
On-Road Repairs



Original article: https://www.sheldonbrown.com/on-road-repairs.html on sheldonbrown.com
- Reproduced with the permission of John Allen and Harriet Fell — all rights reserved. The version on sheldonbrown.com is authoritative.
- Mirrored: 2026-10-09 · Last update of the original: see original
The Need for On-Road Repairs
A bicycle must make a tradeoff among reliability, versatility, light weight -- pick any two, or some compromise among the three. Outside areas with heavy bicycle use and closely-spaced bicycle repair services, any bicyclist will have to perform some common on-road repairs, or ride with a companion who can perform them, or call for a ride now and then. Even the simplest, most rugged beach cruiser bicycle can't offer the trouble-free service you would expect of a lawnmower, car or refrigerator. Still, the mechanical simplicity of the bicycle and the resulting ease of common repairs, performed with lightweight tools, allow bicycling to be a practical travel mode.
. This article identifies the tools needed to perform common on-road repairs, and links to other articles on this site that give detailed repair instructions. There is also good information in books and online.
Simple On-Road Repairs
Any bicyclist ought to know certain basic procedures:
- How to fix a flat tire. Flat tires are the most common mechanical problem requiring immediate attention. This site has an entire article about flats and flat repair.
- How to remove and replace a wheel, covered in the article about fixing flat tires. This is important when transporting a bicycle, but also to replace an inner tube or a tire (though a punctured inner tube also can usually be patched without removing the wheel). Correct adjustment of quick-release assemblies on hubs is especially important for safety.
- Chain adjustment on a non-derailer bicycle. This is part of the task of replacing a wheel, and is covered in our article about derailerless drivetrains.
- Cable replacement and adjustment, for brakes and shifters. There's an article on this site about cables.
- Basic wrench skills, to disassemble, reassemble and tighten parts.

The On-Road Tool Kit
What tools should you carry, to get you home or to a bicycle shop?
Stories abound of bicyclists who go on tour lugging 10 or 15 pounds of tools, ready to fix almost anything on their bicycles.
At the other extreme, a road racer carries no tools. The team mechanic follows in the team car, ready to supply a replacement wheel or entire bicycle as needed.
A reasonable toolkit for a more typical bicyclist weighs a pound or two and covers the most common on-road repair needs. The weight can be even less on a modern bicycle which uses exclusively Allen-wrench fittings. The tools fit into a small bag which straps to the underside of the saddle, or which can be carried in a pannier or touring bag.
A small tool kit allows a bicyclist to get rolling again almost every time something goes wrong. You might carry some tools which you don't need for your own bicycle, to lend a helping hand to other bicyclists who are stranded. That has been the start of many a beautiful friendship!
Quick List
Here's a quick list; longer descriptions follow. You may not need all of these for your bicycle: -- the "Swiss Army knife" of bicycle tools as needed if needed (used with most cranks) (used with most cranks), or freewheel remover
- Lightweight gloves
- Old toe strap to use as a "third hand" tool to hold caliper brakes shut
- Cell phone to call for a ride in case everything else fails -- or with a smartphone, you can look up repair instructions online. Keep sheldonbrown.com on your Favorites list!
OK, Longer Descriptions
- Tools and supplies to fix flat tires -- pump, tire levers, patch kit, tire boot. For more details see the article on flat tires on this site. In case you can't find the leak or the inner tube is irrepairable, you might carry a spare inner tube. Replacing the inner tube can be faster than patching, too.
- Multi-tool-- the "Swiss Army knife" of bicycle tools, which includes several metric Allen wrenches (which insert into hexagonal holes in bolt heads), flat-blade and #2 Phillips (cross-head) screwdrivers and often a small socket wrench. The multi-tool provides a single, convenient handle for all of these tools.
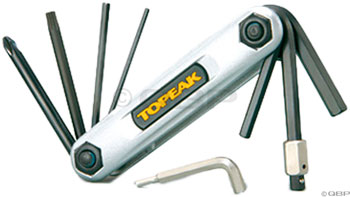
- Allen wrenches which the bicycle uses and are not included in the multi-tool.
- Torx wrenches or kit (like a multi-tool) if your bicycle uses Torx-head bolts (Torx wrenches are like Allen wrenches but with a star-shaped cross section),
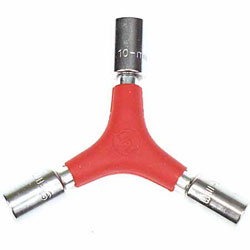
- 8-9-10mm socket Y wrench.


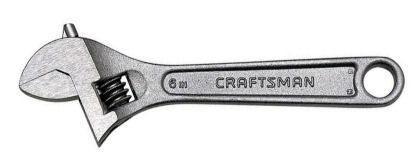
- 6-inch adjustable wrench if your bicycle uses nuts and bolts with hex heads -- and to straighten bent parts or lend a helping hand to another cyclist. See Sheldon's article on adjustable wrenches. The adjustable wrench also can remove and replace most pedals -- though many pedals also have an Allen wrench fitting on the inner end of the axle. Keep pedal threads well-greased, because a 6-inch adjustable wrench does not have as much leverage as a purpose-built pedal wrench.
- Crank puller, unless your bicycle uses an Allen wrench to pull the cranks. The Allen wrench is usually 8 mm, and many multi-tools do not include that size. More details are in the article on cotterless cranks. Park universal crank puller
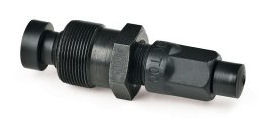
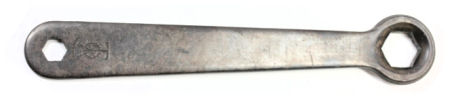
- A crank bolt wrench like the one shown is currently sold by René Herse Cycles, and fits bolts with 15mm bolt heads -- which are interchangeable with others. More details are in the same article. You need one of these wrenches unless your bicycle uses an Allen wrench to pull the cranks. If the dustcap removes with an Allen wrench, use your multi-tool. For a screwdriver slot, special tools are made, but you can hold the flat-blade screwdriver at a low angle so it reaches from one end to the other of the slot.
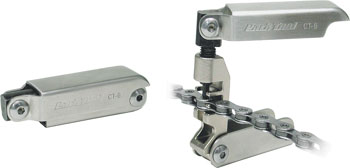
- For the chain: chain tool, replacement pivot pins if your bicycle has a Shimano chain; master link pliers if a SRAM chain; spare PowerLink, or PowerLock for a 10- or 11-speed SRAM chain. See Sheldon's article on chains, and chain tools on sale at Harris Cyclery. Park folding chain tool


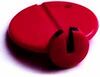
- Spoke wrench to fit the spokes of your wheels.

For Longer Trips
Especially if you are traveling in rural areas, you do well to carry a few additional supplies:
- A second spare inner tube
- Spare folding tire, or wire-bead tire rolled up like a bandsaw blade. See video on how to roll up a wire-bead tire.
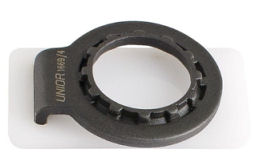
- If your bicycle has a cassette, a Unior emergency cassette lockring tool. You need to remove the cassette to replace spokes on the right side of the rear wheel. Unior cassette lockring tool
If your bicycle has a freewheel, you could carry a freewheel extractor, but then you will have to borrow the use of a vise or large adjustable wrench unless you are lucky enough to find the tool which lets you use the handlebar stem. As I recall, this tool was made only to fit SunTour freewheel extractors.
Freewheel extractor holder with freewheel extractor


- Spare inner cables for brakes and shifters
- A few spare spokes and spoke nipples. The spokes are traditionally taped to the frame, but Kevlar emergency spokes are available, which you can keep folded up in your tool kit and which install on the right side of a rear hub without removing sprockets. Harris Cyclery sells these as well as conventional spokes.
- A few links of chain matching your bicycle's chain. As already mentioned, if your bicycle has a 9-speed or higher Shimano chain, you will also need replacement chain pins and the tool to install one. If a SRAM or Wipperman chain, a spare master link. Best advice is to avoid more than an 8-speed system.
- Small bottle of oil
- Spare batteries for battery-powered bicycle lights.
More Complex, Even Astonishing On-Road Repairs
Necessity is the mother of invention. More articles in this series are in the works. Two are complete as of now:
On-Road Wheel Repairs -- to get you rolling again if your bicycle has suffered a broken spoke or bent wheel.
Emergency Frame Repairs -- If your bicycle has a steel frame and fork, an emergency repair is possible in a metalworking shop anywhere in the world, and sometimes even out on the road.