Good Cable Installation For Good Braking And Shifting
Please read this article in connection with our main article about cables. That article describes the different types of cables and cable end fittings.
Gearshift and brake cables often show the difference between a hastily assembled bike and one which has been assembled by a mechanic who cared what he or she was doing.
Especially now that new handlebar designs seem to come along every week, a good mechanic must understand the theory of routing cables. One can no longer rely on a couple of rote "rules of thumb" for routing cables correctly.
Although people pay a lot of attention to what kind of derailers and brakes are fitted to a particular bicycle, good cable installation practices are more important than most differences between different brake and shift systems. The most expensive brakes and derailers will work poorly if there is excessive friction or play in their control cables. Even cheap brakes and derailers can usually be made to perform satisfactorily if care is used in installing the cables.
The great majority of service problems with brakes and gears results from cable friction or misadjustment, not deficiencies in the levers, calipers or derailers.
Cutting Housing and Preparing the Ends
A very common source of excessive cable friction or "sponginess" is improper cutting or failure to shape the ends of the cable properly, allowing actual compression.
Helical Housing
Parts of traditional cable
plastic outer covering
helical housing
plastic liner
inner cable
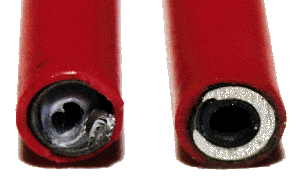
Conventional helical housing can be cut with a good diagonal cutter or a shear cutter made for bicycle cables. When you cut the housing, sometimes the cut will be clean, but other times, the last loop of the helix may get crushed down, partially blocking the passage that the inner cable must slide through. Usually, you can make a second cut and trim off the bent half-loop.
Even when the housing is cut cleanly, the end is not square and perpendicular, due to the pitch of the helix. Careful mechanics will grind or file the end of the housing so that it is flat and flush. The best tool for this is a grinding wheel, but it can be done with a file.
When you cut the housing, the end of the plastic liner also gets cut, and often gets squashed flat. You can use a scriber or a sharp awl to open it up and round it out. If you use a grinding wheel to dress the end of the housing, have your scriber right at hand so that you can open up the plastic liner immediately after grinding. The heat from the grinding will partially melt the liner. By sticking the scriber in before the liner cools off, you can not only round out the end, but the shape of the scriber will actually flare the end a bit for a smoother transition.
Raw Cut End
Finished End
Ferrules
Cable ferrules
Ferrules are small caps, usually of nickel-plated brass, which fit over the end of a piece of cable housing. They help keep the housing aligned with the cable stop it fits into. Whenever possible, you should fit a ferrule on each end of a cut piece of housing. Some housing stops/adjusting barrels are too small to fit a ferrule into, so you don't always need to use one. Such stops will generally be a snug enough fit that they will act as a ferrule.
Many brake levers take a ferrule which inserts directly into the lever. The image below shows some examples. All four of the ferrules in the top row are of essentially the same design and are interchangeable.
Ferrules for brake levers. The one at the bottom, for an old Mafac lever, includes an adjuster.
The image below shows a BMX brake lever with one of these ferrules. The cylindrical cable end should be oiled, so it rotates smoothly in the lever. The cable may be removed and replaced by loosening it, pulling out the ferrule and sliding the inner wire out of slots.
Many modern flat-bar levers are threaded for an adjusting barrel, and a simple ferrule fits into this. The adjusting barrel and its locknut are slotted to ease removal and replacement of the cable. The lever itself may or may not be slotted.
Ferrules are particularly important with index-compatible housing. Even so, individual longitudinal housing strands can sometimes poke out of a ferrule next to the inner wire. You may have to look closely to notice the rogue strands. They cause deteriorating, erratic shifting. Generally, pre-cut index-compatible cable housing with tight-fitting ferrules is immune to this problem. Smaller-diameter (4 mm) index-compatible cable housing will generally fit into housing stops without removing the ferrules. Shimano ferrules have the small ends curved over to keep the strands of index-compatible housing from migrating toward the hole.
It is possible to strip the plastic cover off traditional cable housing to make it fit into an unusually tight ferrule or cable stop. This is not possible with index-compatible cable housing, as the outer plastic sleeve is structural.
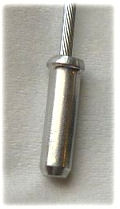
Cable-end Treatment Bicycle cable end, by Armchair, CC BY-SA 3.0 via Wikimedia Commons, croppedThe inner cable is composed of strands of wire braided and/or twisted together. They can unravel at the end if not secured.
The traditional treatment is to solder the strands together at the end of the cable. Ordinary rosin-core electrical solder does the trick. This treatment allows the cable to be pulled through the anchor bolt and housing to reinstall or relubricate it.
Solder adheres only to cables with tinned (galvanized) strands, not to stainless-steel cables -- which can usually be identified by their shinier appearance. Some stainless-steel cables are sold with the strands welded together at the end, but that only works if you don't trim the cable. You could also use cyanoacrylate glue ("crazy glue") to bind the end of a cable, but the common treatment is a small aluminum cap, which can be pressed onto the ends of a cable with pliers or the crimping jaws of a cable cutter. The cap will prevent you from scratching yourself and will keep the cable from unraveling, but must be removed and replaced with a new one every time you disassemble and reassemble a cable.
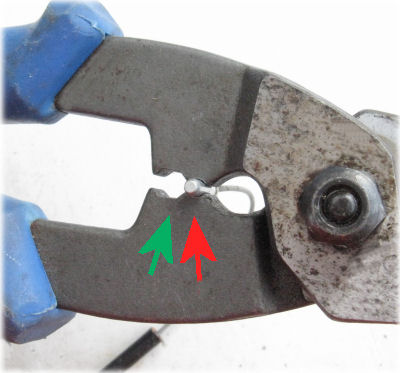
The red arrow in the photo below points to a cable cap in the crimping jaws of a Park cable cutter tool. The green arrow points to larger jaws to crimp a ferrule to the end of cable housing.
An inner cable that has unraveled at the end is unsightly but doesn't affect performance. You may be able to pull an unraveled cable out of its housing for servicing, but you can't reinsert it. It's good to leave the end of a cable long by a couple of inches so you can trim it back if it has started to unravel. Unraveling can often be reversed as long as individual strands have not become bent, by laying the strands back over one another, working from the middle toward the end of the cable.
The photos below show a cable end unraveled and restored -- photo credit Pamela Murray.
Unraveled cable
Restored cable
Cable Replacement
To replace a derailer cable, you want to start out with both the derailer and the shifter in whichever position has the cable slack. This will usually be the position corresponding to the smallest chainring/rear sprocket.
If you disconnect the cable (or if it broke) and pedal the bike a couple of times, the derailer will automatically go to the correct position.
While operating the shifter to get it to shift to the loosest position, you may need to pull on the cable. If the shifter indexes, it will stay in that position. If it is a friction shifter with a return spring, you may have to tighten the friction adjustment to get the shifter to stay in the loosest position.
Once the derailer is disconnected from the derailer's anchor bolt, pull the housing (if any) away from the shifter, and then push the exposed inner cable into the shifter. The moulded end of the inner cable should then pop out of the shifter. If it's a simple lever shifter, such as a down-tube or bar-end shifter, the cable end is readily visible.
If it's a more complicated ratcheting type shifter, there will usually be an access hole where the cable end can pop out...but this access hole may line up correctly only if you remembered to shift to the loosest gear position first. In case a Shimano STI shifter does not release to this position, please see advice on another page.
Hole for cable insertion is visible after releasing the shifter to the loosest position and squeezing the brake lever.
Cable insertion into STI brake-shift lever. Arrow indicates forward motion of cover plate when brake lever is squeezed.
Twist-grip shifters such as SRAM GripShift are typically the most difficult for cable changing, and these commonly require disassembly.
Generally, the derailer limit stops should not require any adjustment when you replace a cable, but you will need to adjust the indexing.
Before connecting the cable, screw the adjusting barrel all the way in, then back it out maybe a turn or a turn and a half. This will give you the opportunity to loosen the cable a little or to tighten it a little or a lot.
Front Cable Replacement
Thread the cable through the shifter and any housing. Check the condition of the housing and particularly the open ends. Replace or trim if needed. See also my Cables Article. Pull on the cable and operate the shifter until you have the slackest position. The chain will normally be on the smallest chainring.
Run the cable under the anchor bolt hardware and secure it. If it's an indexing system, and particularly with triple chainrings, you will need to fine-tune the indexing to get it to shift well and run smoothly on the middle chainring.
Rear Cable Replacement
Thread the cable through the shifter and any housing. Check the condition of the housing and particularly the open ends. Replace or trim if needed. See also my Cables Article. Pull on the cable and operate the shifter until you have the slackest position. The chain will normally be on the smallest rear sprocket.
Method A:
Use a pair of pliers to pull the cable really tight and secure the anchor bolt. Use the adjusting barrel to correct the indexing adjustment.
Method B:
(This is how I do it. Only works if you have the bike in a workstand of some sort, unless you have three hands.)
Hand pedal forward with your right hand while manually pushing the rear derailer inward until the chain engages the 3rd smallest sprocket. Stop pedaling, then let go of the derailer. The derailer spring will try to move the derailer outward toward the smallest sprocket, but the stopped chain won't let it go all the way.
Pull fairly firmly on the end of the cable to take up the slack and secure it with the anchor bolt. Then you can pedal and check the indexing adjustment. I find that this usually gets me quite close, with only a minimal amount of fine tuning needed to the indexing adjustment.
Cable Routing at the Handlebars
Drop Handlebars
The cable for a handlebar-end shifter is best carried under the handlebar tape, and a trigger shifter is best placed under the brake lever, as described in more detail in our article about taping handlebars.
With traditional brake levers (exposed cables arch upwards.)
The traditional way to run exposed brake cables is so that they loop up and over the back of the handlebars. This provides the smoothest, most gradual curves in most cases.
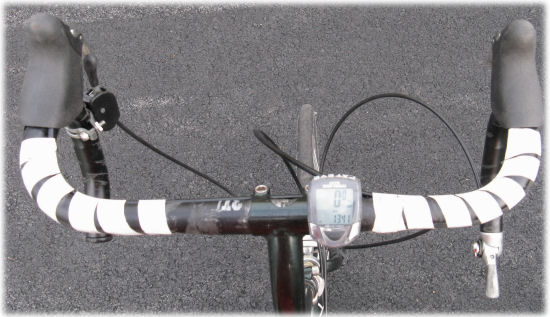
In the case of bicycles with cyclecomputers or stem shifters, it is usually preferable to run the cables under the bars so that they won't encumber access to the computer or shifters.
Under-the-bar routing is also desirable for bicycles with unusually tall or short-reach stems, so that the rear cable won't have to make a sharp bend at the top tube.
Don't mix systems: either run both brake cables over the bars or both under. This is for æsthetic reasons, not mechanical ones.
If a handlebar bag is to be used, install it first so you can be sure that the cables will clear it.
"Æro" brake levers (cables run under the handlebar tape.)
The usual set-up involves running the cables along the inside of the upper part of the handlebar. It is important that the housing be tightly wrapped against the handlebar, or the braking may be spongy.
Some handlebars have grooves for the cables. To ensure firm contact of the housing against the stop inside the lever, the cables should be fully connected and put under tension before they are taped down. One good way to do this is to use a toe strap to hold the brake lever tightly applied while securing the section of housing that runs along the handlebar.
It is good practice to use electrical tape or other adhesive tape to secure the cable housing against the handlebar, as shown in the photo below. Then it is easier to apply the normal handlebar tape afterwards, and to replace the handlebar tape at a later date.
Gear cables for Campagnolo "Ergo" brake-lever shifters run along the handlebars with the brake cables.
Gear cables for Shimano brake-lever shifters run out the inboard side of each lever. The cables can get in the way of a handlebar bag.
The rear brake cable can go on either side of the head tube. When the handlebars are turned as far as they can go in one direction, they will pull the cable tight. In the other direction, they will create more slack in the housing. On a bicycle with sidepull brakes, the upper arm of the front brake limits the handlebar turning scope in one direction, as the brake arm comes into contact with the down tube. The rear brake cable should then go on the side of the stem opposite the front brake cable...this way you will not have to allow so much extra slack in the rear cable, since the handlebars can't turn as far in the direction that will tighten the rear cable.
Upright Handlebars
Normally, brake cables run under the handlebars.
If the handlebar stem is drilled through to act as a cable stop, the front brake cable will need to loop over the bar.
The rear brake cable should cross over around the stem, unless there is an off-center cable stop on the side of the top tube nearest the rear brake lever.
Gear cables can usually be routed behind or around a handlebar bag.
The segment of cable that traverses a pivot or telescoping joint must be run in housing. A cable to a front hub brake should run in housing even with a rigid fork: the fork's slight flex can tighten the cable and lock the wheel.
The Four Commandments of Cable Routing:
The handlebars must be able to turn as far as they can in both directions without being limited by a cable pulling taut. Instead, the turning limit must be set by the handlebar bumping into the top tube or by the brake arm or reflector bracket bumping into the down tube.
No wrong direction bends (For example: as the rear brake cable leaves the top tube and makes the bend down toward the caliper, it should make a smooth transition from parallel to the top tube to parallel to the seatstays. If the cable bends up from the top tube before bending down toward the seatstays, it is probably too long. If the cable curves out past the caliper, then bends back at an angle more vertical than the seatstays, it is certainly too long.
Bends that cannot be avoided should be made as wide (gradual) as possible,
Cable housings should be as short as they can be without violating the above rules. If a housing is attached to a part that moves, test it at the extreme positions it will take when in use. Apply a brake; shift a derailer to the positions where the cable is tightest and where it bends the housing the furthest in each direction. Be especially careful with front and rear suspension, which reach their limit positions only under load.
This cable housing is too long -- there will be unnecessary friction and slop:
This cable housing is correct:
This cable housing is too short -- when the brake is applied, the housing will not reach:
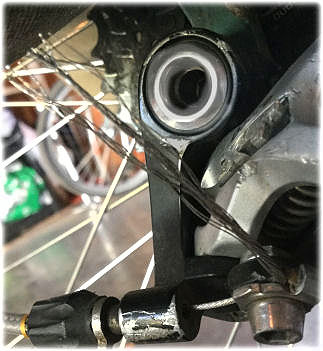
Someone didn't read our advice on cable routing. DO NOT RUN AN OPEN CABLE TO A FRONT HUB BRAKE! The rear cable is maybe just a tiny bit long too.
Right Front or Left Front? The usual system is to have the rear brake controlled by the lever on the side of the bicycle that corresponds to the side of the road that it will be driven on, i.e., right in most of the world; left in the British Isles, Japan, and other places where they drive on the left. (The European Union, however, has standardized on having the right-hand lever control the front brake). Nobody knows exactly why this is. My theory is that it is based on the reasonable idea that you should be able to have your primary braking hand on the handlebars while making a turn signal with the appropriate hand -- coupled with the erroneous idea that the rear brake is the primary brake.
I prefer to set my own bicycles up with the front brake controlled by the right lever. This allows me to signal and stop at the same time, and also lets me use my stronger, more skillful hand for the more critical front brake. (I rarely use my rear brake.)
Since this is the opposite of the prevailing national standard in the USA, I would never set up a bicycle this way for a customer without a specific request to do so. I have an article on Braking and Turning which addresses these issues in more detail.
Gear Cable Routing
More often than not, shifting problems are due not to any problem with the derailers, but to excessive friction in the cables that control them. The usual effect of cable friction is to make the derailer move sluggishly when the return spring is pulling it toward a smaller sprocket.
The most common area for this problem is the short loop of cable housing that leads from the rear stay to the derailer. The front end of this housing is exposed to road spray from the front tire, and the resulting rust can seriously degrade shifting. This cable loop should be fairly long, so that it makes a very gradual curve. Many bikes have too short a housing loop here.
And as already described, index-compatible housing should be cut when bent into the shape it will take when in use.
You must have a ferrule at each end of each piece of index-compatible housing. This keeps the housing from falling apart and helps keep the hole in the housing aligned with the cable stop.
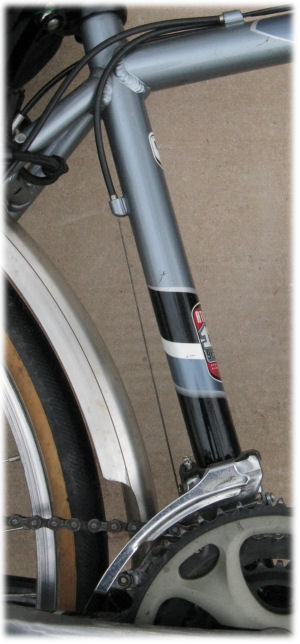
Another problem area is the cable guide where the cables run under the bottom bracket. In addition to sluggish upshifting, friction in this area can cause spontaneous upshifting under load.
Some newer front derailers are designed with a choice of two cable attachment options. If the cable is run on the outside of the anchor bolt, away from the parallelogram pivots, the cage moves less far for a given cable movement, providing a lighter action, and easier fine trimming.
If the cable is run on the inside of the anchor bolt, toward the parallelogram pivots, the cage moves farther for a given cable movement. This is often necessary to provide correct functioning with indexed shifters.
Over or Under the Bottom Bracket?
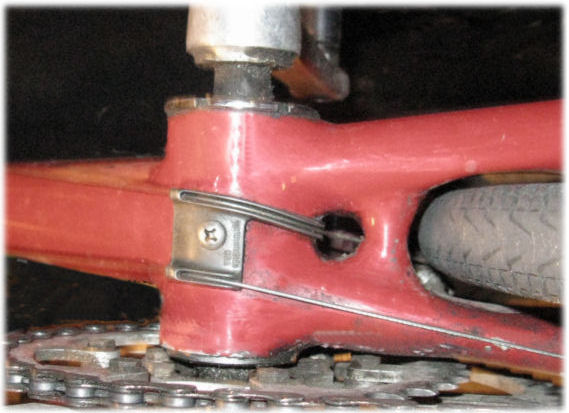
Over Up until the mid-1980's, the usual way to run gear cables was above the bottom bracket, either using short pieces of cable housing, or, more commonly, simple guides, either brazed onto the bottom-bracket shell, or clamped to the frame. From the guide, the rear cable would run along the top of the right chainstay to a cable stop at the rear of the stay, for the final loop to the rear derailer.
This worked quite well, until mountain bikes came on the scene and made granny gears a standard item. The extended cage of a wide-range front derailer would interfere with the rear gear cable.
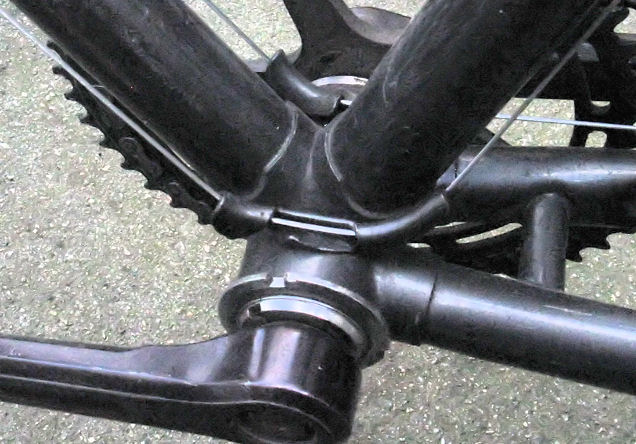
Under The popular solution to this problem was to run the cable under the bottom-bracket shell, and move the chainstay cable stop to the underside of the chainstay. This had the added advantage of being cheaper--a simple plastic block bolted or riveted to the underside of the bottom-bracket shell took the place of a brazed-on or clamped-on set of guides. Most multi-speed road bicycles are now made this way.
Unfortunately, this routing tends to degrade shifting somewhat. Locating the chainstay cable stop down below creates a sharper curve for the final loop of housing, and also exposes the entrance to that loop to crud splashed up by the front wheel. The bottom-bracket guide, whether over or under the bottom bracket, is also exposed to sprayed mud and crud from the front wheel...a particular problem for off-road cyclists.
Top routing The third option, increasingly popular for mountain bikes, involves bypassing the bottom bracket altogether, and running both gear cables along the top tube. Top routing of the front derailer cableThe rear runs down along the seatstay, and the front runs down the back of the seat tube. When this style first arose, in the early '90's, front derailers were intended to be operated by a cable pulled from below. Early top-routing schemes used a brazed-on pulley on the back of the seat tube, a rather mono-buttocked solution, in my opinion. This problem has been solved by the ready availability of "top-pull" front derailers.
Cable routing and front-derailer choice on folding bicycles and on bicycles with rear suspension are dictated by the need of the cable to flex around the pivot.
Autoshifting
Cable that runs either over or under the bottom bracket can sometimes contribute to "autoshifting", spontaneous upshifts of the rear derailer under heavy load. This issue is addressed in a separate article.
"Criss-Cross" Cables
Most bicycles with handlebar-mounted shifters run the rear cable on the right, the front on the left. This causes some awkwardness in routing housing from the shift levers to the frame stops. Because these housings have to be long enough to permit the bars to turn all the way back and forth, the housings often wind up making a reverse bend--for instance, the rear will go from the shifter, which is on the right, swing forward and cross over past the centerline of the bicycle, then back over to the right side of the head tube, before heading down the down tube. These extra bends increase friction, and the fairly forcible contact between the housing and the side of the head tube can damage the finish.
A neat solution to this is to run the cables "criss-cross" style: The rear runs from the lever, (on the right) around the head tube, and to the cable stop on the left side of the downtube! The front cable crosses over similarly from the left side of the handlebar to the right side of the downtube.
The bare cables then cross one another under the middle of the downtube, making an "X". The cables may touch where they cross, but very lightly, since they are both straight...the tiny bit of friction at this crossing is more than offset by the reduction in friction in the smoother-flowing cable housings.
This technique does not work with over-the-bottom-bracket cable routing, but is doable with most newer bikes that have under-the-bottom-bracket cable routing and cable stops mounted toward the bottom side of the down tube.
New cable too short? This problem can occur when you can't get a long cable for a tandem or when you need to re-use a front cable at the rear. Don't necessarily throw away cut-off inner wire. It can be spliced in open runs.
There are commercial cable splitters for bicycles with separable frames. Two cable anchor bolts in a strip of metal drilled at both ends also can splice cable. In an emergency, two lengths of cable can be spliced together with a square knot. Bend each piece into a tight "U" shape a couple of inches from the end, then loop them together to form the knot and pull hard on the cable with the lever to tighten it up. You may have to readjust the cable more than once. Highly flexible braided cable may need to be bent into a "Z" shape so it can be knotted once more in order to hold. This is an inelegant but reliable repair with a shift cable, probably not so reliable with a brake cable.
You probably don't want to carry a cable cutter with you as you ride. You can store excess cable temporarily by coiling it and weaving the end around the coils.
And -- if a cable breaks at the lever end, as is usual, and you have left some excess, many shift levers will work if you tie a knot in the cable. Yes, you could prick your fingers, but then also you can continue your ride and have the use of the gearing. This repair might also work with a brake lever if you tie a larger knot, but we haven't tried it and it is strictly for emergencies. It's really better to carry spare cables.
These Boots are made for Cabling
Cable boot
Where a cable end faces upwards, rainwater can run down inside the housing. The water can rust the cable, but worse, in cold weather, the water can freeze and disable a brake a few minutes after taking the bicycle outdoors. The boot used where the cable of a direct-pull brake crosses between the brake arms can be used here to keep water out. Pack the boot with grease to keep water from running down inside. Oiling the cable also helps.
Lubrication
Cable Lubrication
In the old days, before the development of plastic-lined housing, it was necessary to coat the inner cable with light grease or heavy oil.
Modern plastic-lined cables have made the use of grease inappropriate, because the viscosity of the grease makes for sluggish cable movement. This is a more critical concern with modern brake and gear systems that use weaker return springs, and with indexed shifting in general.
Many manufacturers now recommend against using any lubrication on cables. It certainly should be avoided with sealed systems such as Gore-Tex ®. Bicycles used in wet conditions, however, will often benefit by the application of a bit of oil, more as a rust-preventive than as a lubricant. The area of particular concern is the short loop of housing which carries the rear derailer cable around from the chainstay to the derailer.
Some bicycles provide awkward cable routing which forces housing to enter cable stops/adjusting barrels at a fairly sharp angle. This is particularly common on rear cantilever brakes. It often helps to put a bit of grease on the bit of cable that runs through such fittings.
Hardware Lubrication
Much of the hardware associated with cables requires lubrication on assembly.
Adjusting barrels must have lubrication on their threads, if they are to remain usable.
Anchor-bolt threads should also be lubricated, lest the threads strip as you tighten them. Brake-cable anchor bolts are the most important fasteners on a bicycle. They are small, and many of them have holes drilled through them, so it is easy to strip/break them, but...
If you don't get the anchor bolts tight enough, the brakes will appear to work properly in normal use. Then, someday a bus will cut you off, and you will squeeze the brakes extra hard to make a panic stop...just when you need the brakes to work their best, the cables will slip and the brakes will fail completely, with no warning. How to test that cables are secure? Grab each brake lever in turn with both hands, and squeeze hard. Shift cables aren't subject to as much strain, but still, shift to the position with the cable tightest, and pull hard on the lever to check.
Take The Trouble To Do It Right
At the risk of repeating myself, let me again urge you to pay careful attention to all aspects of cable routing. Care in cable installation is much more important than having the latest titanium doo-dads!